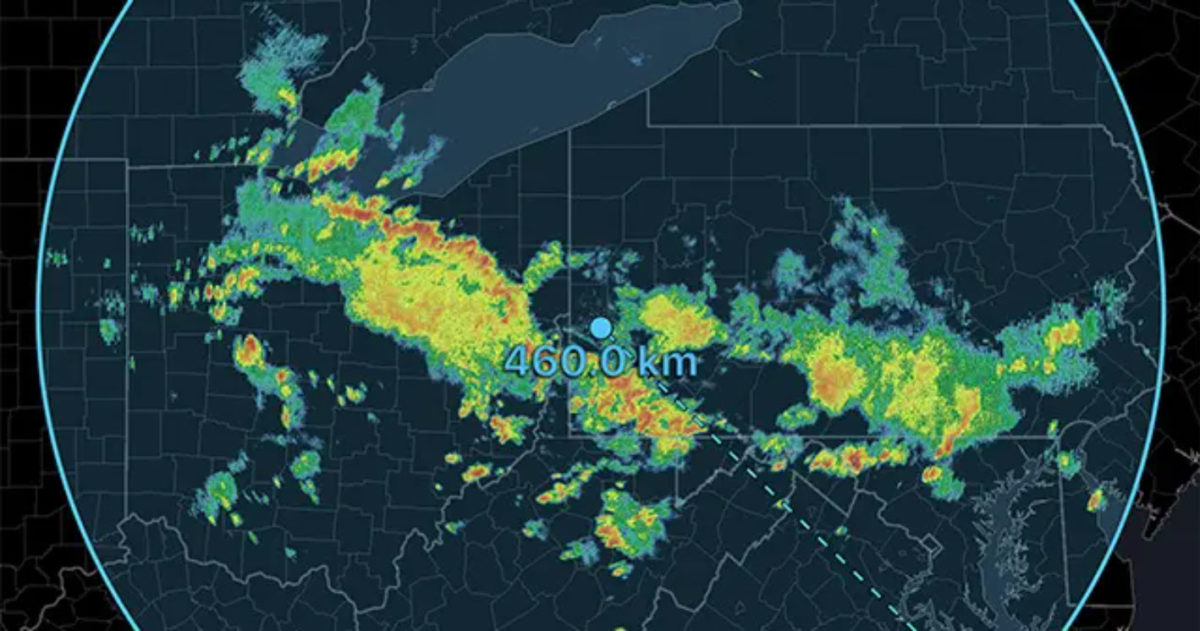
Do you want to add your home or business location to RadarScope, so you know exactly where the storm is in regards to you? It’s really quite simple to do. The following lesson will walk you through adding locations to both iOS and Android devices.
iOS
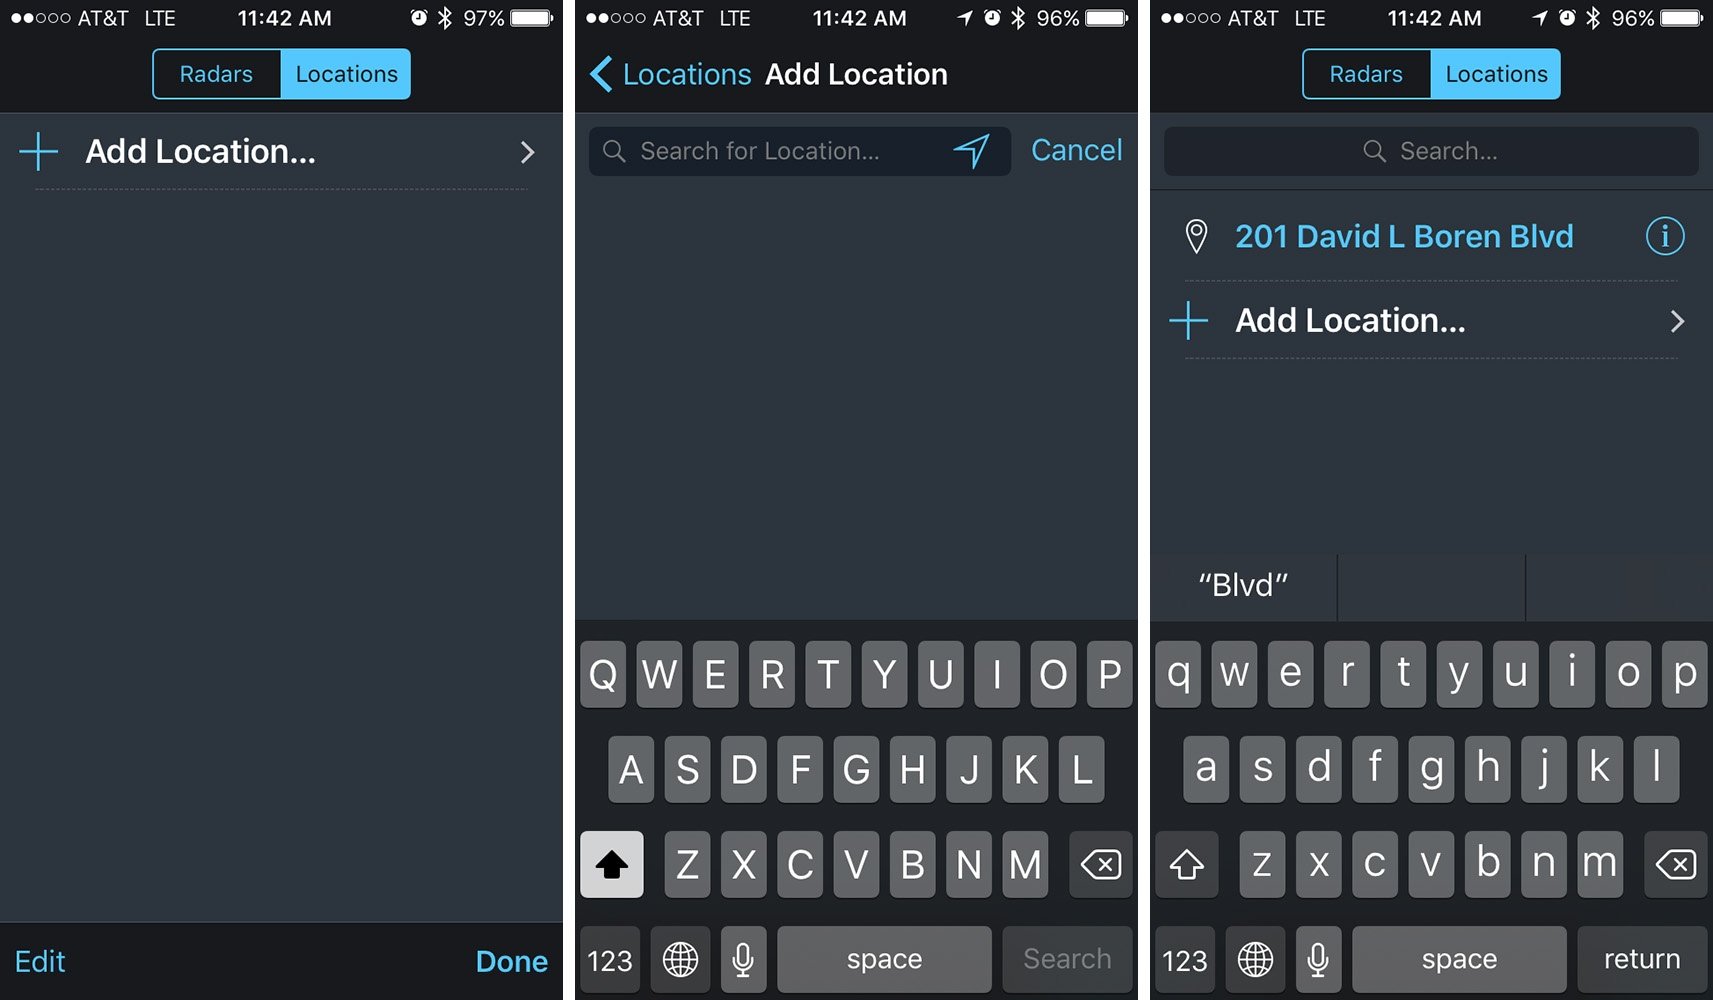
For an Apple product, here is how adding a location works. Tap the name of the radar at the top of the screen to get the Radars/Locations window. Make sure Locations is highlighted. Then tap Add Location. Now, type the address you want into the box and tap on it when is appears in the Search Results. If you’d rather it be called something other than the street address, click on the little “i” or information icon.
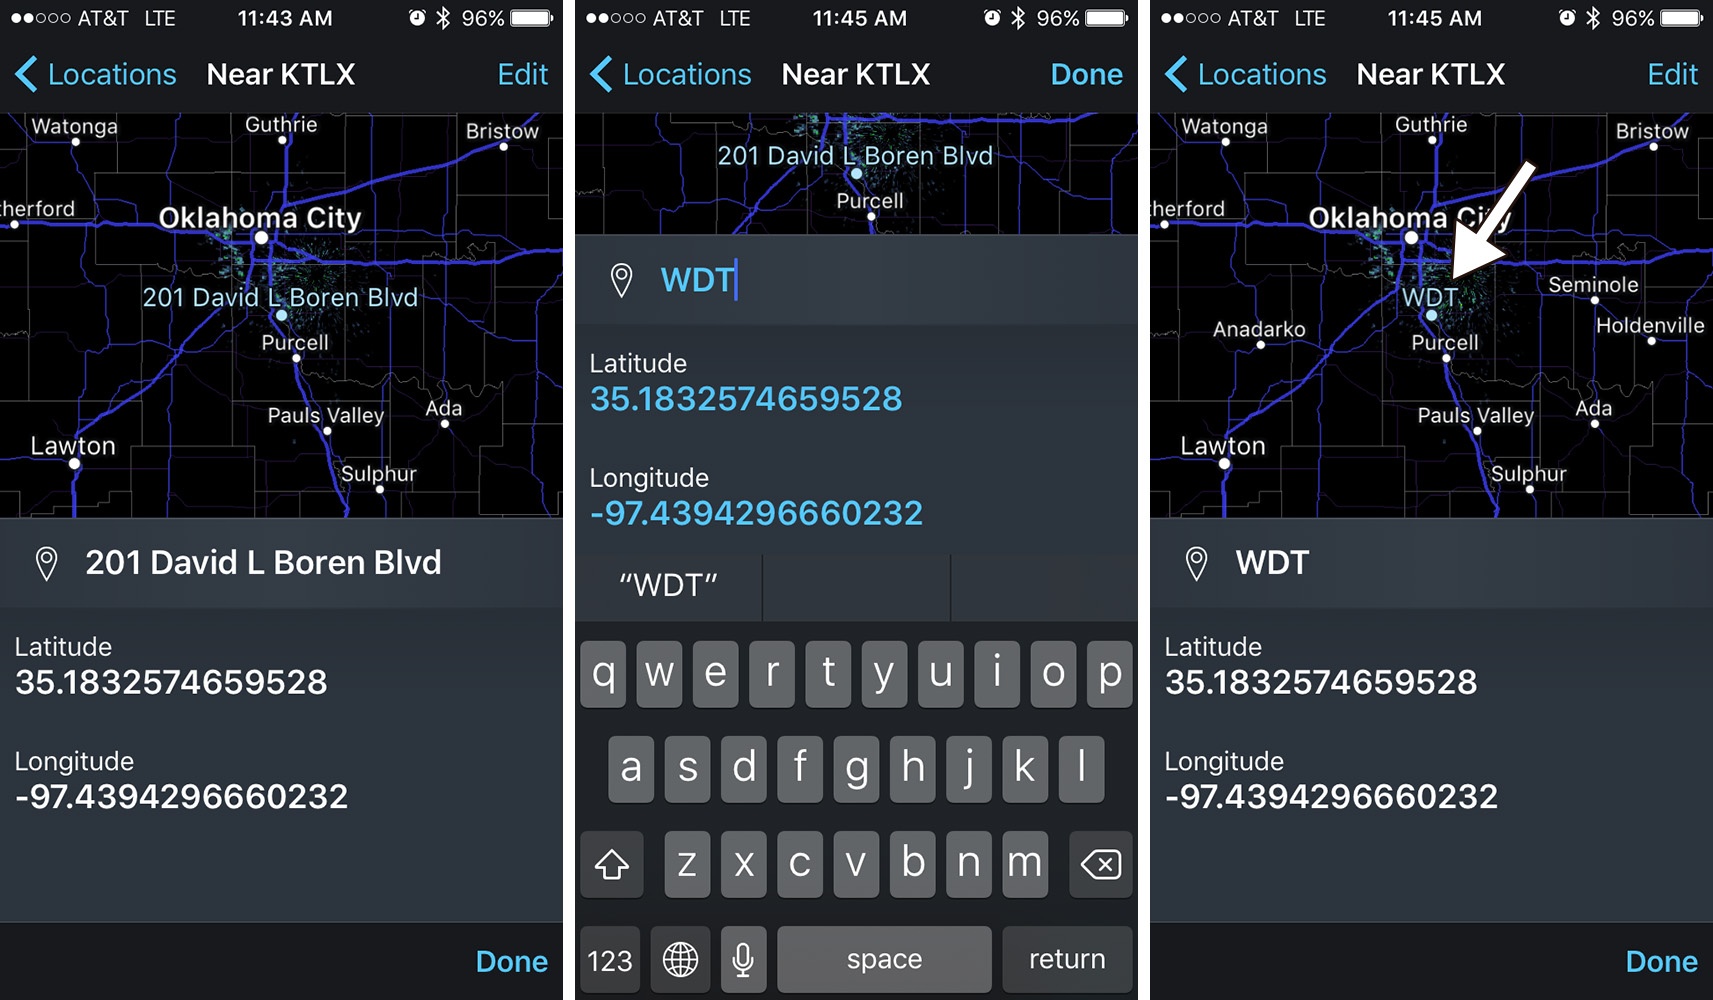
Next, tap on Edit and rename the location. Tap on the Done button and your location will now appear on the radar background map.
Android
Here is how to add a location on an Android. Open up your navigation drawer and tap on Radars and Locations. Make sure Locations is underlined. Then tap on Add Location. Type the address in the box. If given a selection, choose the address that is most appropriate.
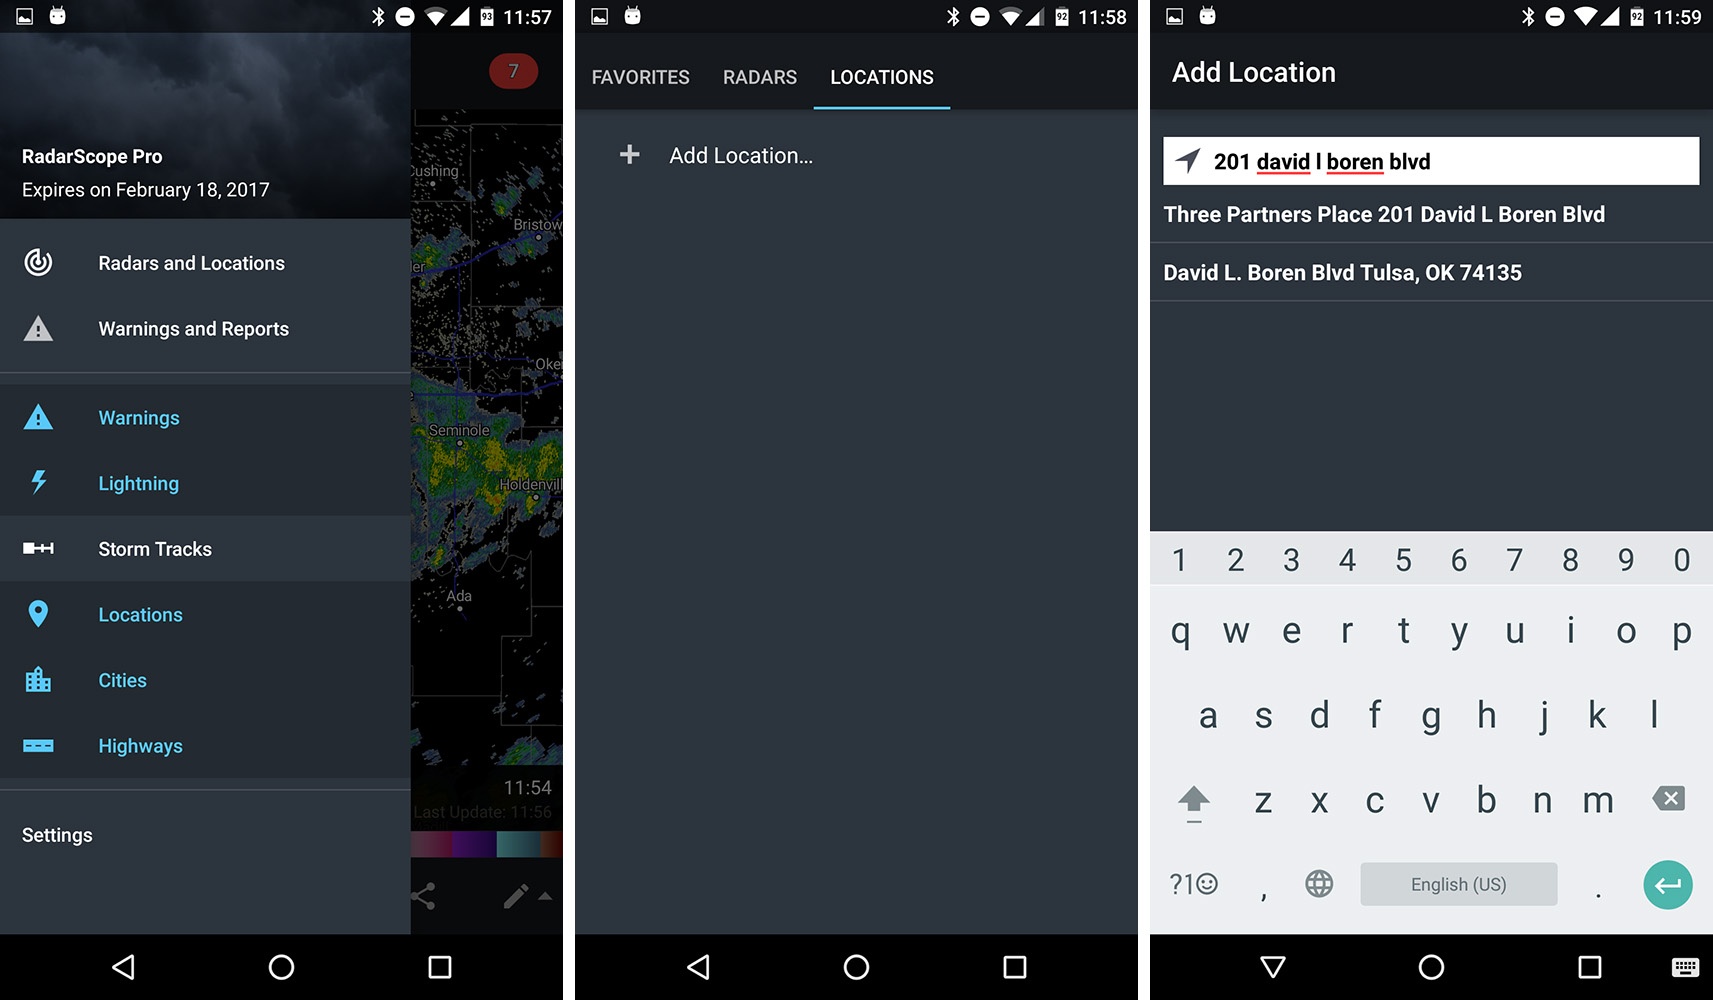
The location is now saved into your app. However, maybe you want to call it something shorter than the full street address? Just tap on the address and rename it. Save your new name and tap on View In Map. Your location is now visible on your background map.
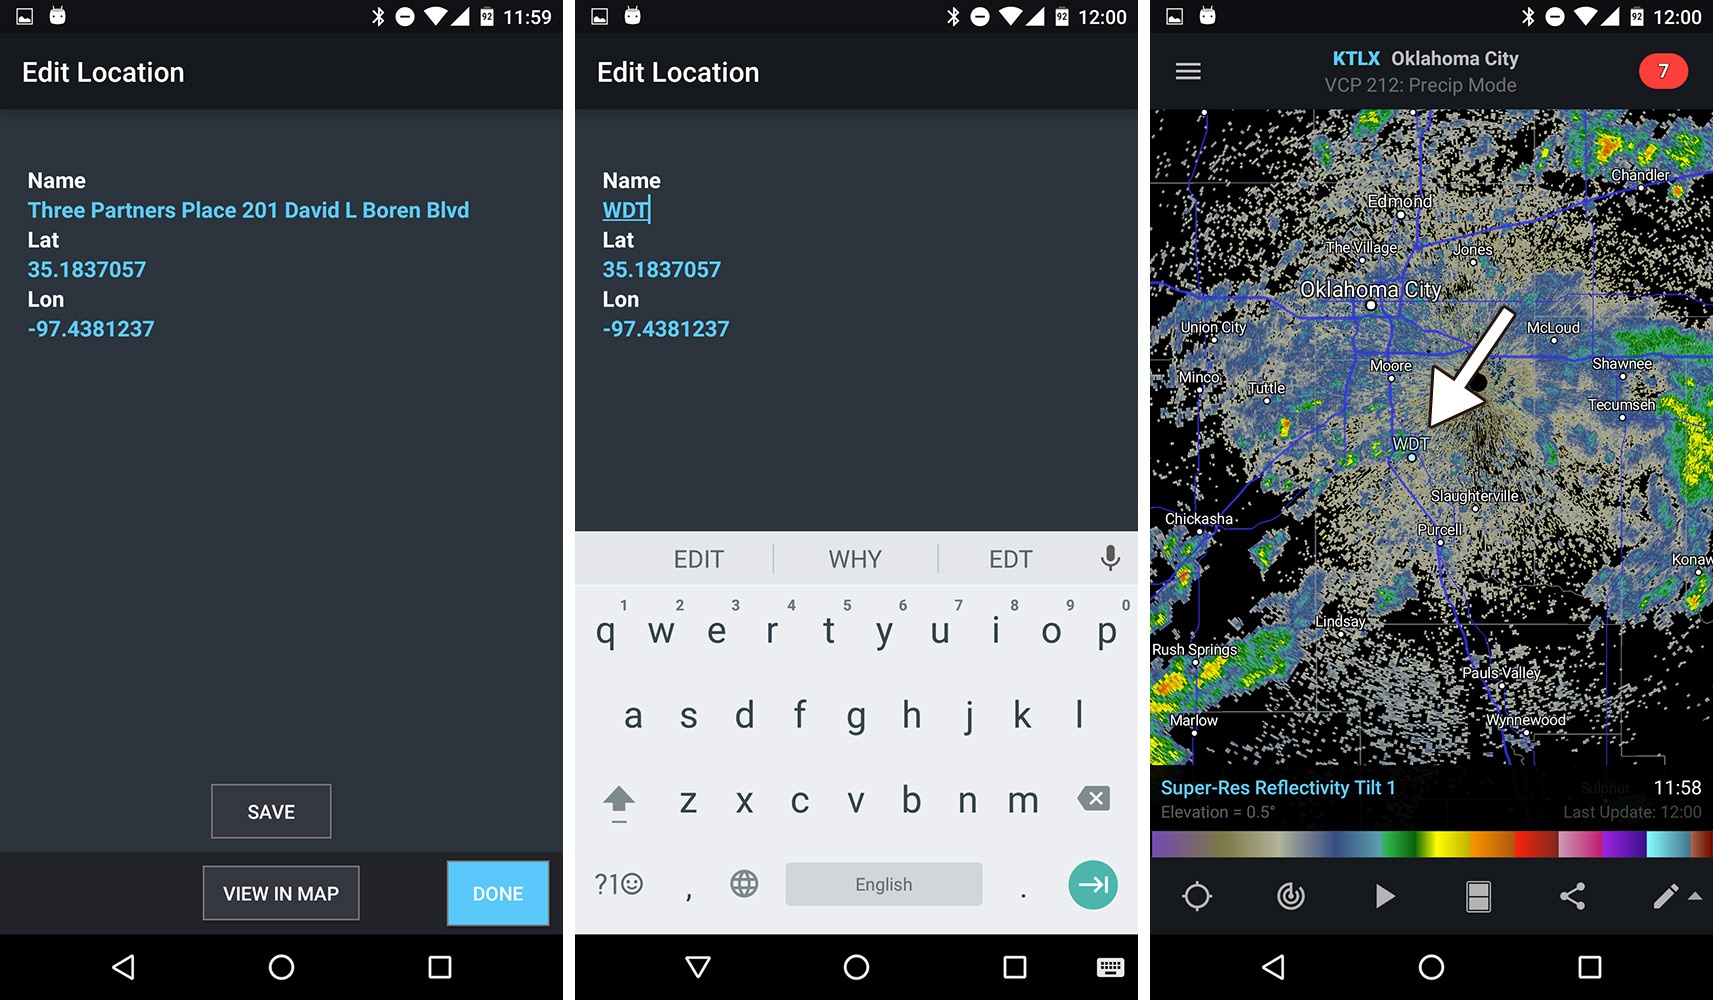
While easy to do, many don’t realize this possibility exists. You can add numerous locations and no longer have to guess if the storm will impact you. With your favorite location right on the map, you can continue to stay aware of any severe weather approaching.

