RadarScope 4.2 gives Pro Tier Two subscribers the ability to change the standard color palettes for radar products. Custom color palettes let you choose colors that better meet your needs or viewing preferences. In this post, we’ll walk through the process of creating your own custom color palette from scratch. We’ll be using macOS in this example. The steps are similar on other platforms, with some differences depending on the app you to edit the files.
RadarScope color palettes are defined in plain text files with a “.pal” filename extension. They are based on the format used by Gibson Ridge Software, with some modifications to support certain RadarScope features. You can create a color a palette using any text editor the platform of your choice. For this example, we’ll be using the TextEdit app on macOS to create a custom color palette for reflectivity products.
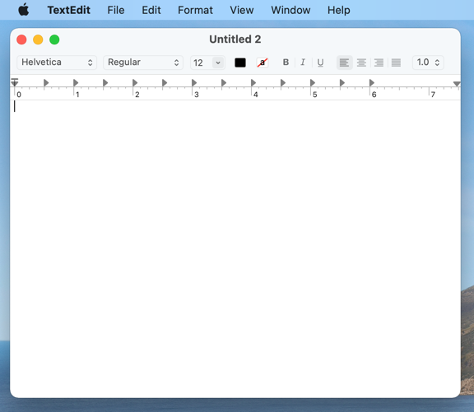
1. Open the TextEdit app.
Locate the TextEdit app in the Applications folder on your Mac. Double-click the icon to open it.
![]()
2. Create a new document.
From the File menu, select “New” to create a new document. Then from the Format menu, select “Make Plain Text” to change the document format to a plain text file.
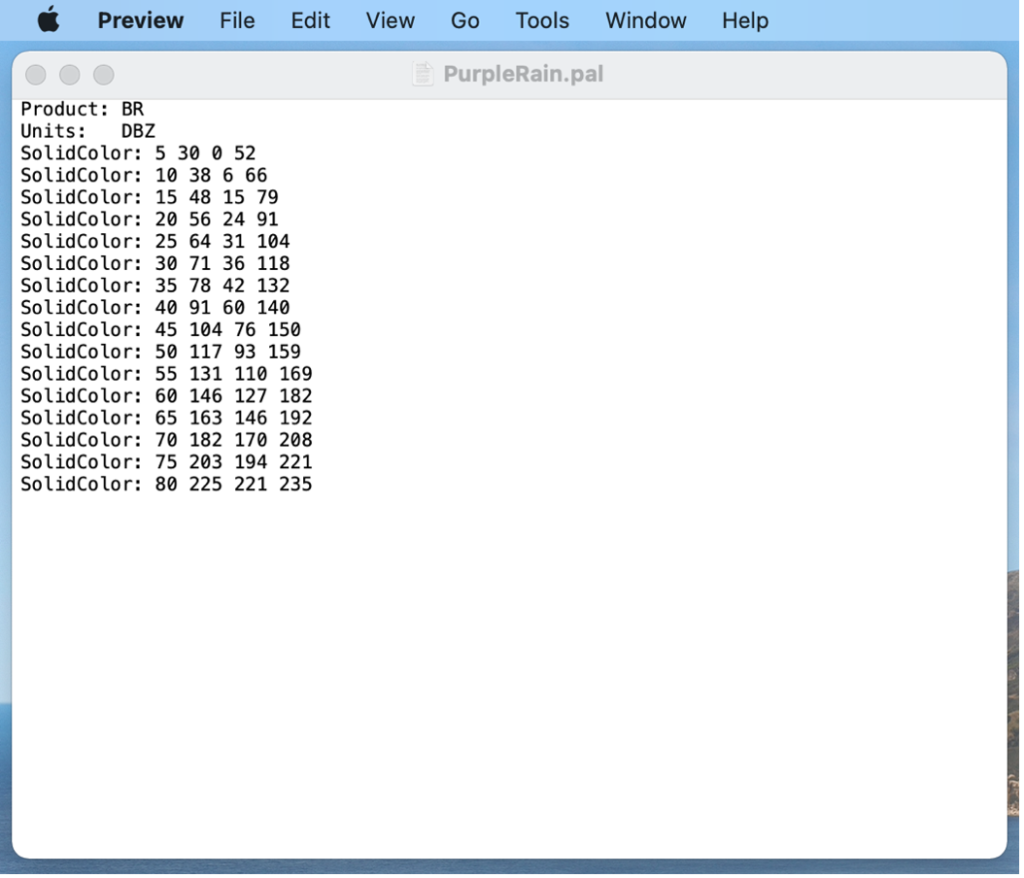
3. Enter the Statements to Define the Color Palette.
In your document, you’ll type a series of statements that define your custom color palette. Just enter each of them as shown here. First, every color palette needs a Product statement, which specifies the types of radar products for which it can be used. We’re creating a reflectivity color palette, so we need to enter “BR” or “DR” as the product type.
Product: BR
Every color palette also needs a Units statement to tell RadarScope what units to use when translating the colors in the palette to values in the radar data. Reflectivity products always use units of “DBZ”.
Units: DBZ
Next, you’ll enter a series of Color statements that match values in the radar data with the colors you wish to use to display them. There are several variations of color statements supported by RadarScope. We’ll use the SolidColor variation here. Each statement includes a data value and a set of three values that define the red, green, and blue components of the color. We’ll enter colors for reflectivity values ranging from 5 dBZ to 80 dBZ.
SolidColor: 5 30 0 52
SolidColor: 10 38 6 66
SolidColor: 15 48 15 79
SolidColor: 20 56 24 91
SolidColor: 25 64 31 104
SolidColor: 30 71 36 118
SolidColor: 35 78 42 132
SolidColor: 40 91 60 140
SolidColor: 45 104 76 150
SolidColor: 50 117 93 159
SolidColor: 55 131 110 169
SolidColor: 60 146 127 182
SolidColor: 65 163 146 192
SolidColor: 70 182 170 208
SolidColor: 75 203 194 221
SolidColor: 80 225 221 235
Now that you’ve entered all of those statements, your document should look something like this:
4. Save the file.
You’ve created your color palette. Now you need to save the file so you can import it into RadarScope. From the File menu, select “Save…” Give the file a name and select a location in which to save it.
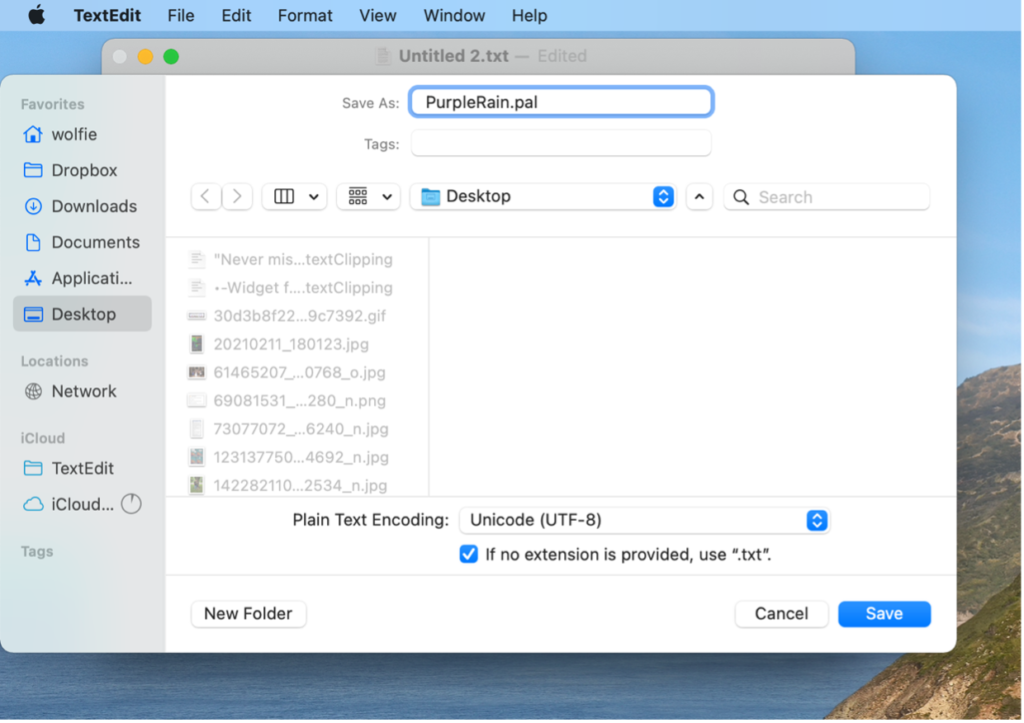
In this example, we’ll be importing the color palette into RadarScope for macOS, so you can save it anywhere on your local disk. If you’re importing the palette into RadarScope for iOS, you may want to save the file to your iCloud Drive where your iOS device can access it.
5. Import the file into RadarScope.
To import your color palette, open RadarScope for macOS. In the Colors menu, select “Reflectivity”, then “Import Color Palette…”
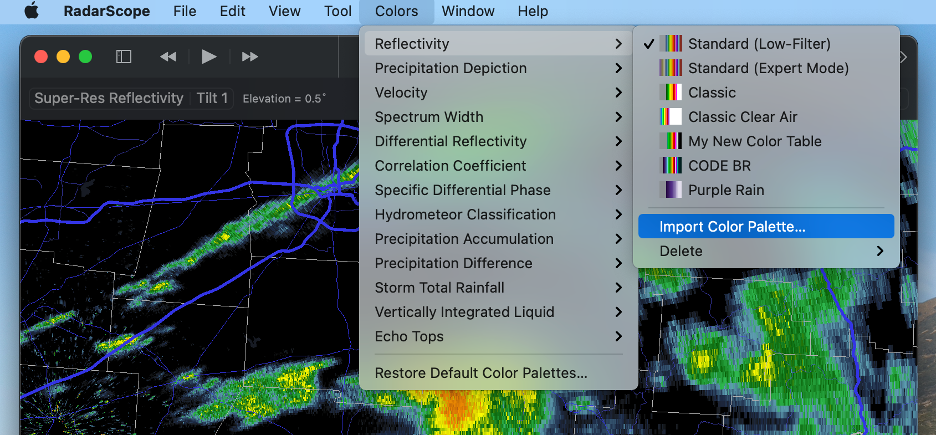
Locate the color palette file you just saved, select it, and click “Open”.

If you entered the statements correctly, your file should import without any errors. If errors are reported, open the file in TextEdit again, fix any typos, then try to import it again.
6. Select the Color Palette
Now that you’ve imported your color palette, RadarScope can use it to display reflectivity products. In the Colors menu, select Reflectivity, then the name of your new color palette.
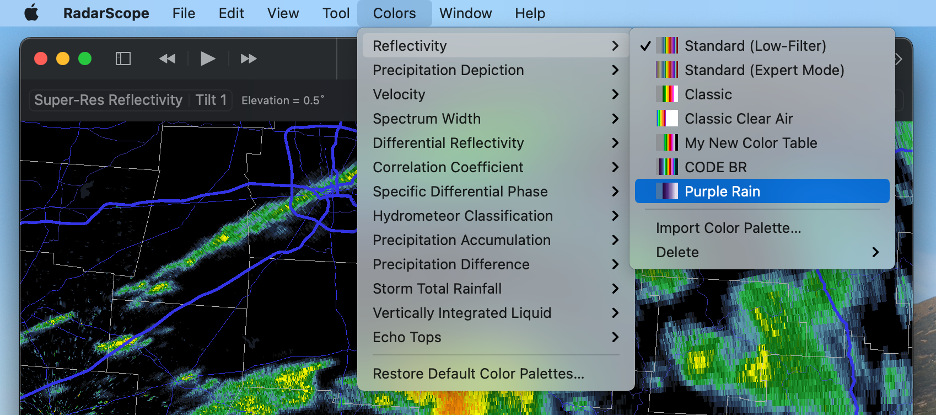
You’re all set! Now RadarScope will use your new color palette when displaying reflectivity products.