When bringing RadarScope to a new platform, we try to strike a balance between RadarScope’s unique personality and the way customers expect an app to behave on that platform. While features behave similarly across iOS, macOS, Android, and now Windows, the user interface often differs from one platform to the next. With that in mind, let’s take a look at how custom locations are added, managed, and displayed in RadarScope for Windows.
The sidebar on along the left side of the RadarScope window is the home for all layers, settings, and controls. The vertical column of icons on the far left control what’s visible in the sidebar. To view locations, you’ll first need to select the layers icon, which is second from the bottom. (NOTE: We’re aware of a bug that sometimes prevents sidebar icons from displaying. The buttons are always there, but sometimes the icon isn’t drawn. We’re working on a fix for this but in the meantime, click where the button should be, and it should work as expected.)
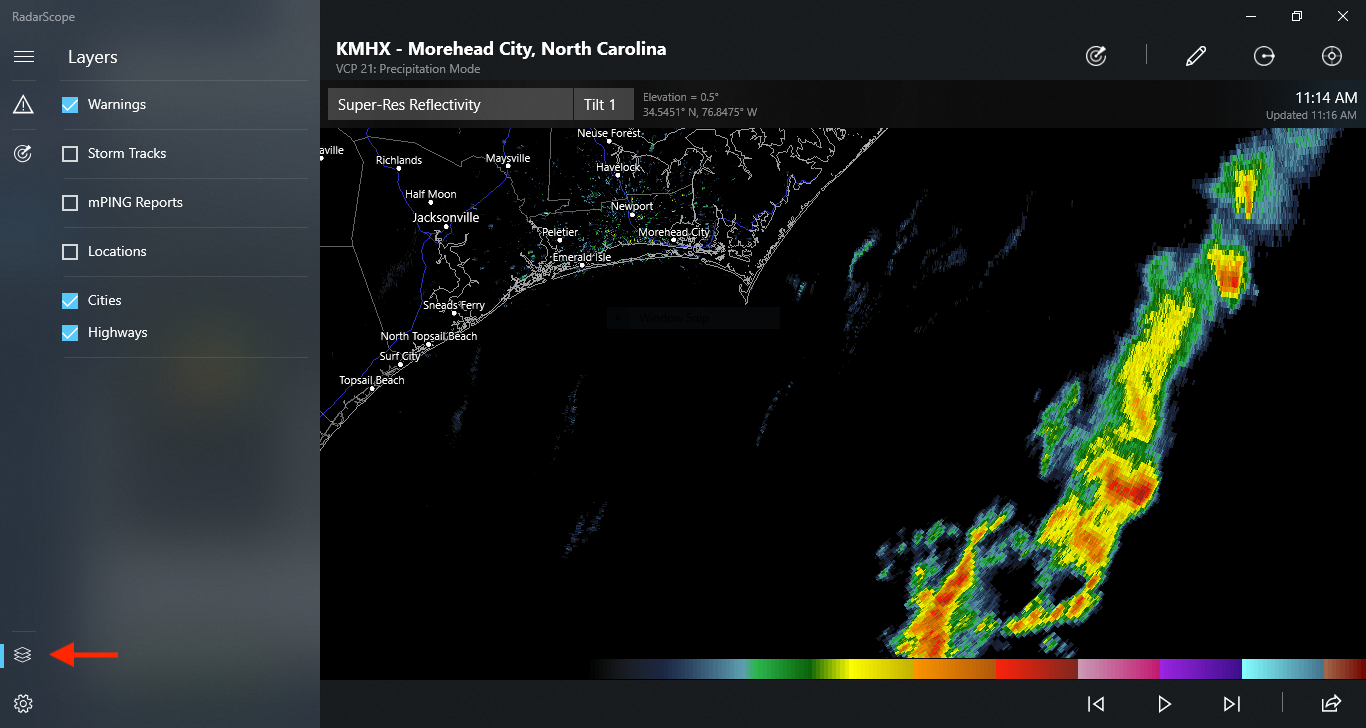
To work with custom locations, you’ll first need to reveal the Locations layer. To do so, click or tap the Locations checkbox in the Layers tab.
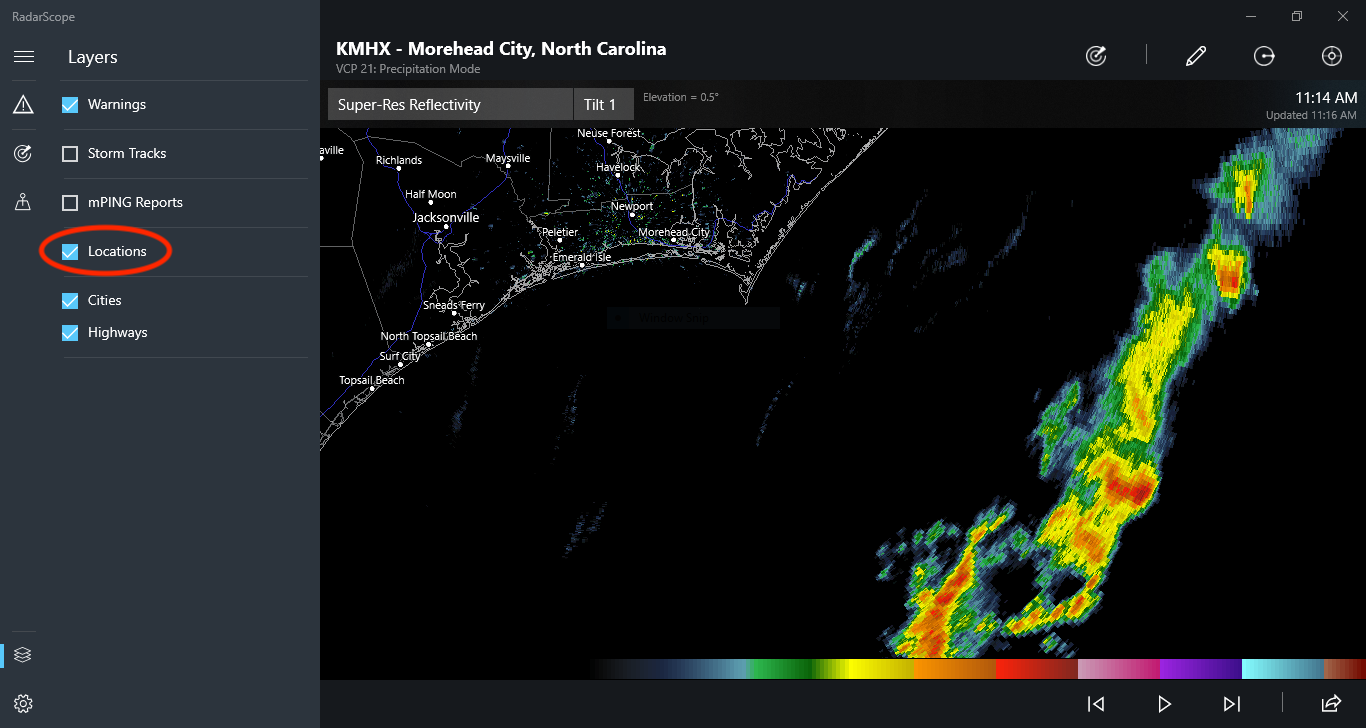
Revealing locations also reveals the Location icon in the sidebar. Click or tap the icon to see the Locations tab.

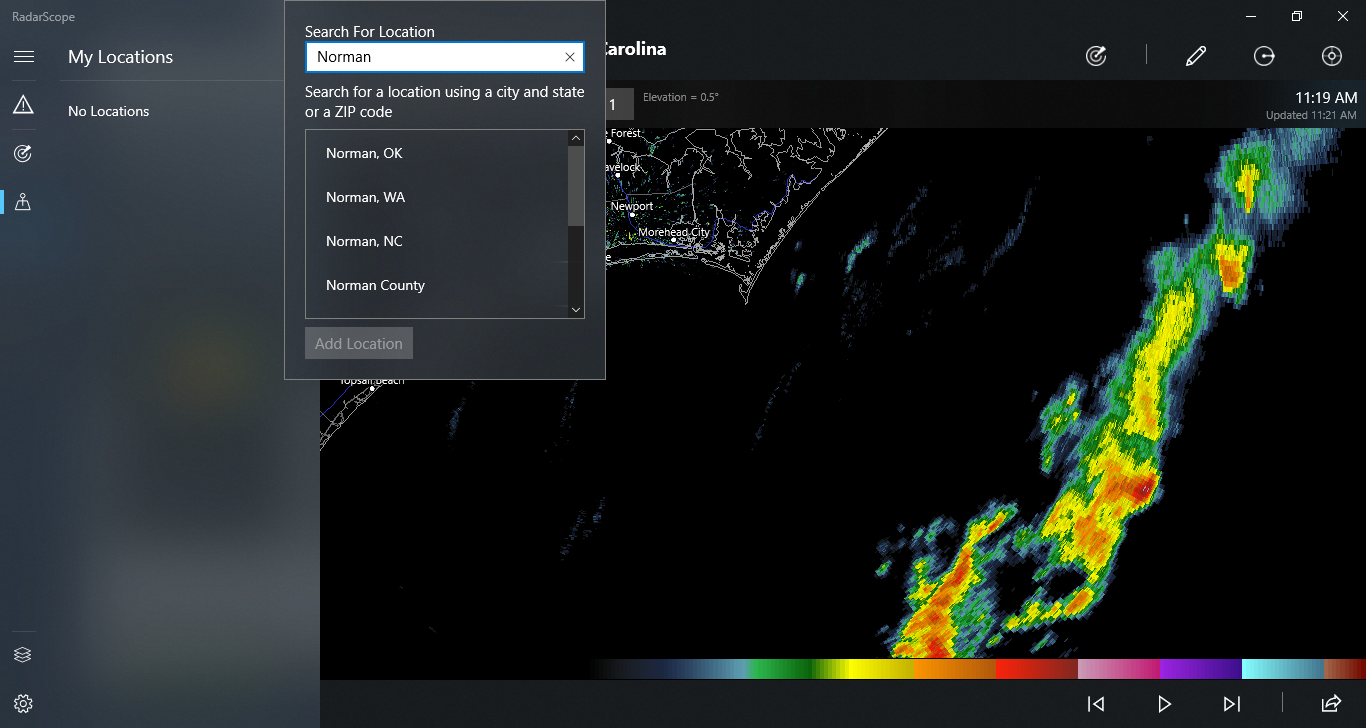
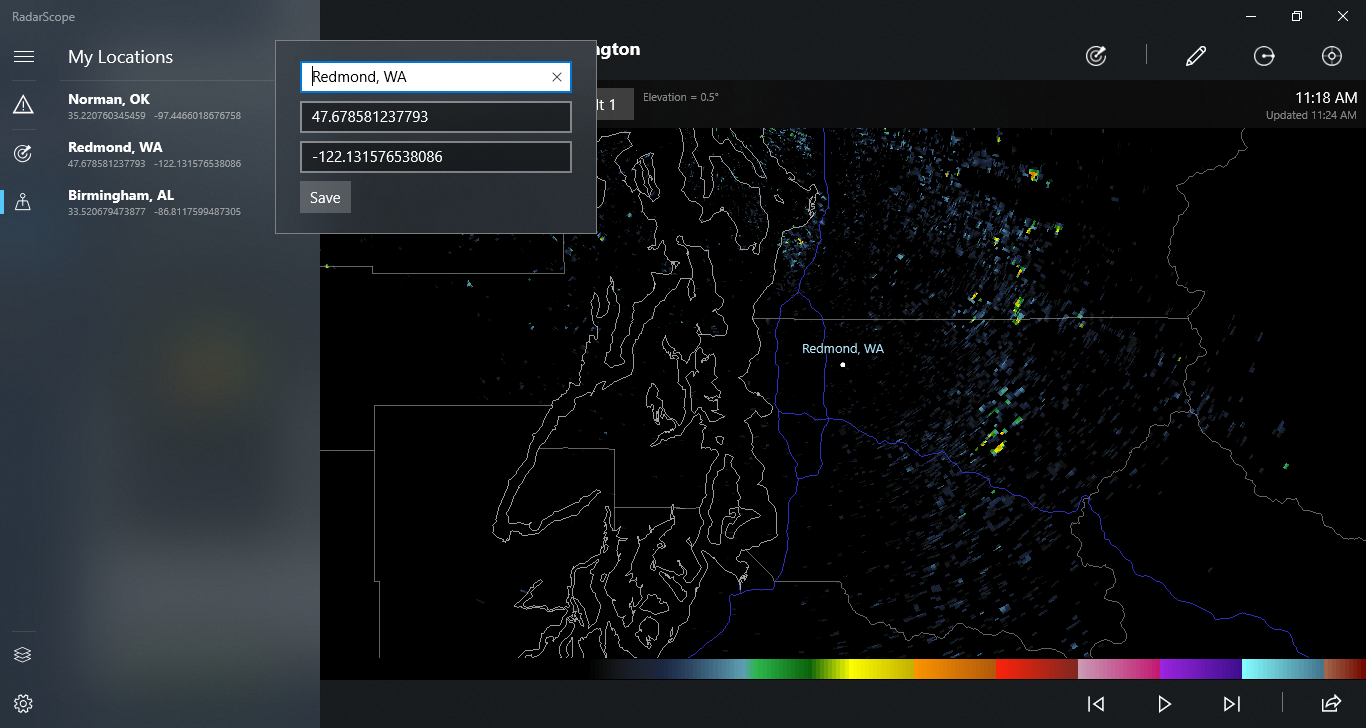
If you haven’t added any custom locations, the list will be blank. To add one, click or tap the + button. Then type a city name or zip code in the search field and hit return. The list below the search field will show possible matches for the location you entered. Select the one you want and click or tap Save.

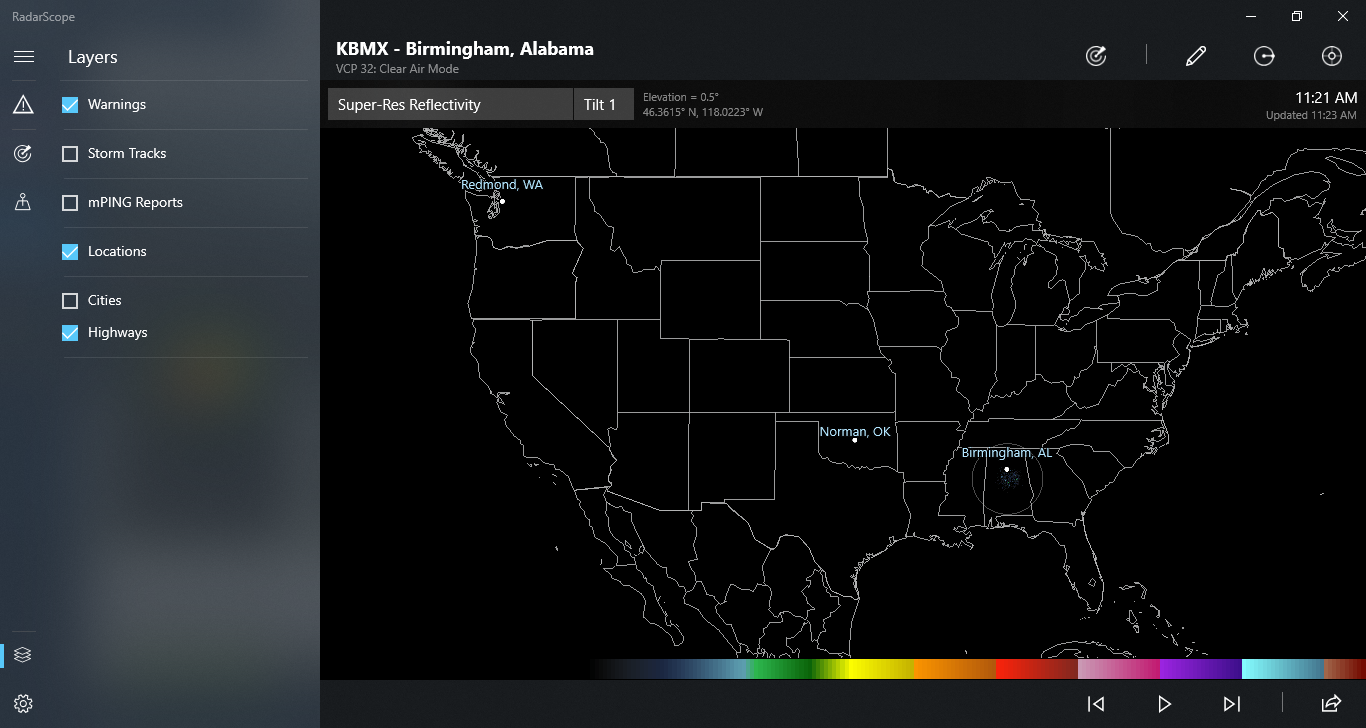
Once you’ve added some locations, they’ll display on the map whenever you have the Locations enabled via the checkbox in the Layers tab.
To modify a location you’ve added, click the Location icon again to reveal the list. Then right-click on the desired location and select “Edit” from the menu. You can change the name as well as the latitude and longitude. Enter your desired changes, then click Save.
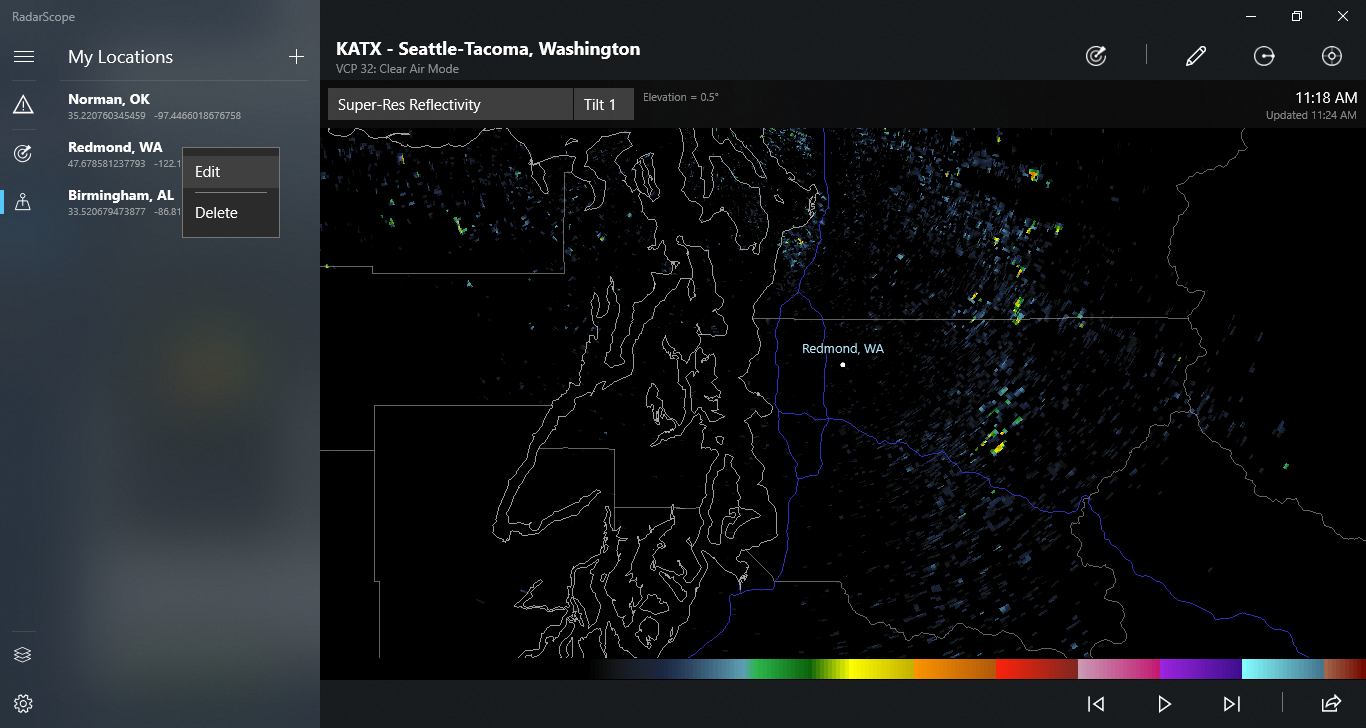
To delete a location, right-click on it and select “Delete” from the menu.
Using the Sync Settings feature in Windows 10, custom locations can be synced across all of your Windows devices running RadarScope. To enable Sync Settings, open the Windows Settings app, click Accounts, then click “Sync your settings,” then turn “Sync settings” on. Changes to your custom locations will be automatically synced to all of your devices soon after you make them.
That’s all you need to know to manage custom locations in RadarScope for Windows. You can learn more about RadarScope on our website at radarscope.io. And if you have any questions, our support staff are available 24 hours a day, seven days a week at support@wdtinc.com.
{{cta(‘7adc9887-5a2e-4a2c-90de-3d3a733f8912′,’justifycenter’)}}